Monday, December 16, 2013

12/16 Value Ornaments

Our last project will be a seasonal one.  I love working on black paper. I think it makes a dramatic piece. We will be using oil pastels to draw in the evergreen branches.  I blended two greens and a dark blue for the needles.  The ornaments will be drawn on white paper with crayons or colored pencils.  We will be adding value.  We worked with value on our very first project in September.  Value is an important art element and worth repeating.  Value makes a flat, 2 dimensional piece look 3 dimensional.  It can help show perspective, light in front, darker in back.  It helps create texture with the play of lights and darks.  When used in a pattern, it leads the viewer's eye around the piece. 

Sorry for the washed out colors.  The sample looks much better in person!

Monday, November 25, 2013

11/26 Mayflower Collage

Since our last class falls right before Thanksgiving, I want to do a seasonal project, but without turkeys.  The Mayflower Collage with 3D elements is what I came up with.

We will look at photos of ships and discuss elements that they have (four masts, wooden, simple...)  We will do a practice sketch before going onto our good sheet of paper.  Students will create an ocean with different colors of torn paper.  The sky will be colored in.  Next the ship will be drawn on a brown bag adding some details with crayons.  The ship will be glued down.  The sails and some additional "waves" will not be glued flat - puffing them up a bit - to create a 3D look.


Monday, October 28, 2013

10/29 - Color Theory Trees

Color theory is defined as: a practical guidance to color mixing and the visual effects of specific color combinations. There are also definitions of colors based on the color wheel: primary color, secondary color and tertiary color. 

For this project we will be creating a color wheel of primary and secondary colors.  We will start with the primary (red, yellow, blue) and mix them to get our secondary (orange, green, violet).  Students will paint six sections on their strip of paper.  These will be used for the "leaves" later on.


My palette of colors.
We will talk about, look at trees and practice drawing a realistic tree.  My drawing is not overly realistic because we need six main branches for this project.
Here is the mostly finished project.  The students' will have more leaves.  I left mine on the light side so they can see the tree.

Monday, October 21, 2013

10/22 - moonlight landscape

Autumn is my favorite time of the year!  I love how the trees come alive with color, all different variety of apples are available and fields of pumpkins color the landscape.  This week's project has a big Autumn full moon (did you see the moon over the weekend?) and a hill full of pumpkins.  We will talk about foreground, middle ground and background and how the size of our pumpkins will show depth in our work.  We will layer and blend oil pastels to round out our pumpkins and add a highlight on top where the moonlight (light source) is hitting.

We will look at a real pumpkin and practice drawing first - no basketball pumpkins!
Students will create three sizes of pumpkins (large, medium, small) on black paper. We will layer colors beginning with a light layer first and building up from there.  The pumpkins will be cut out and glued on the background (hill and full moon).  Lately, curved lines will be added to the pumpkins with black oil pastel.

Monday, October 14, 2013

10/15 - Romero Britto Style Pumpkins

I am a fan of pop art.  It is fun, bold, colorful and I think it has kid appeal.  Romero Britto (b 10/6/63) is a Brazilian born artist who resides in Miami, FL.  His style combines elements of cubism, pop art and graffiti.  Britto is influenced by Matisse and Picasso.  I read that his work "exudes warmth, optimism and love."  He is also a great humanitarian donating time, art and resources to many charitable organizations.


Today we will look at real pumpkins and do a practice sketch.  We will redraw a larger version on our good sheet of paper, making sure there are at least five sections on the final copy.
Students will be given orange, yellow and white paint to mix and create different shades of orange to paint their pumpkins.
We will paint each section, add some patterns, in the style of Britto, and add a background.

Monday, October 7, 2013

10/8 Georgia O'Keeffe Landscape

Georgia O'Keeffe (1887-1986) was a modern, American painter best known for her large, close-up paintings of flowers and New Mexico landscapes. Before she fell in love with the dessert, she fell in love with a photographer.  They married and bought a summer house at Lake George, NY.  Here she painted the area around her.  Below is an image of "Lake George, Autumn" what we are basing today's project on.


Hmm, my phone/camera was not cooperating so the project is on its side.  We will be working with liquid tempera paints to create this pretty fall landscape based on O'Keeffe's work. Students will use tints to paint the sky. I will show how to "hop" the brush to create the fall trees in warm colors. We will discuss tree branches and how they "branch out" from the trunk and then paint them in when the leaves are dry.

Here is a section of the project going the correct way.

Monday, September 30, 2013

10/1 Simplified Landscape

Landscapes have always been a popular subject matter for artists.  There are so many incredible scenes in nature from towering mountains to white sand beaches.  This week we are going to take a nature scene and simplify it into an abstract landscape watercolor painting.  Abstract art uses color, line and shape (remember those 7 elements of art?) to create the subject or feeling rather than a realistic subject that looks more photo like.

Simplifying is not as easy as it sounds!  Kids (and adults) want to get in there and draw every leaf or rock they see.  We are going to look at our images and recreate the basic elements in the photo: a curved coastline, mountains, a rock mass using color and our lines.  We will not be adding details!  We will talk about foreground, middle ground and background and how things are darker in the foreground and lighter the further away they get.

Below are some screen shots of simple landscapes.  Following that are two examples of our project.


A simple coastline with a slice of beach and a rock formation. The sky is lighter closer to the horizon and darker towards the top.
A lake with mountains in the distance.  Notice the background mountains are lighter and the water in the foreground is darker.

Monday, September 23, 2013

9/24 - Bridge Silhouette

The kids have been hearing me talk about the seven elements of art. These are the building blocks of all projects:  line, shape, color, texture, form, value and space. Today we will use line, color, shape and texture.

We are working with watercolors. Students will draw a horizon line and lightly paint the water and the sky.
Next we will start to add some texture with short brush strokes of color. We will continue to fill the space until....
It looks something like this.  When dry (next class) we will sketch in our bridge choice and paint with black tempera paint to create a silhouette.
Here are some famous works with bridges. Please pardon the screen shots. I do not know how to import images!

French impressionist Claude Monet:
American painter Thomas Kinkade:
Japanese artist Hiroshige:
American futurist painter Joseph Stella:
:

Monday, September 16, 2013

9/17/13 - Tessellations

A tessellation is a pattern of repeating shapes that fit together with no gaps.  It is a good lesson to introduce line, shape, pattern and color.  Tessellation comes from a latin word meaning small stone cube.  Very early tessellations were in the form of mosaics.  Modern ones come in all different shapes, but they still interlock and have no space in between.  Artist M.C. Escher, born in Holland in 1898, is known as the "Modern Father of Tessellations".  He became obsessed with filling surfaces with pictures that did not overlap or leave space.

For today's project we will start with a pre-made tracer. It will require some tracing, cutting and taping to have a working piece.  Students will also have the option of cutting their own organic shape. I will walk them thru it.
The shape will be traced across the page and continue on each row, making sure the pieces interlock.  The photo below show examples of the shapes the students can pick from.
Here are the birds interlocking on the entire page.  We will talk about color families (warm, cool, primary, secondary) to help with color selection and how the same color should not touch each other.  If students feel confident, they can try and add some value to the project (light to dark).

Monday, September 9, 2013

9/10 Class - lines

We will start our fall session using lines.  Today we will only use curved lines.  Students will trace circles onto their paper and then connect the circles with curved lines. The goal is to draw interesting shapes to create a visually pleasing composition.

We will be using oil pastels. They lay down smoothly and blend well. We will discuss color theory - primary, secondary, analogous, complementary) and will work on adding value (light to dark).  The finished result is a rather cool abstract piece of art!

Wednesday, June 19, 2013

Art Journaling Workshop - July 2

Looking for a creative way to get your kids to write this summer or to record vacations or events over summer break?  I am offering an art journaling workshop on July 2 at Leidy's Church. I have a few spots left in the 9-12pm class and space available in the 12:30-3:30pm class.  Cost is $25 and includes a 44 page 5.5"x8" journal. This is appropriate for kids 6 and up.  Adults are also welcome to join.  I have two moms currently enrolled.

Art journaling is the best of both worlds; art and words. It is a place to practice different art techniques.  A place to record your thoughts or write a poem. There are no rules, no mistakes, just creativity.

In this workshop we will be learning to make different backgrounds that will be ready to add ephemera (post cards, maps, brochures, tickets), stamps, collage or paint.  We will make pockets, doodle, rip, cut, paint, color, collage to create fun pages for your journal entries.

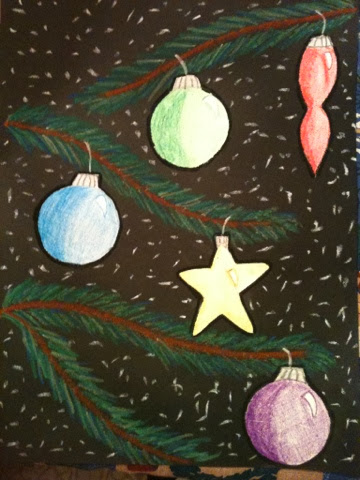
Here are some examples from a previous workshop:
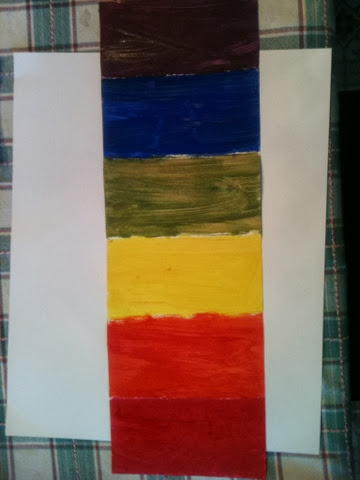
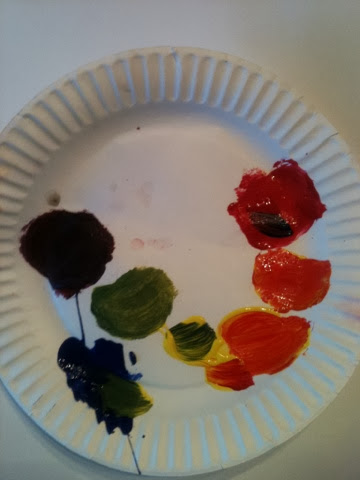

A few backgrounds:


Using ephemera collected on trips:

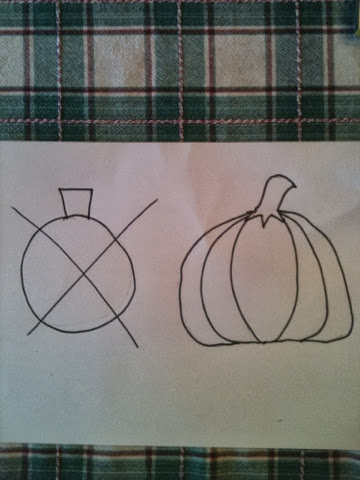
A few examples from my journals:


Wrapping paper background.
Photo copy of my hand.