Sunday, November 23, 2014

Abstract Name Design

Sadly Tuesday November 25 is our last art class for this session.  Most of the students are still working on their "What Makes Me Scream" lesson inspired by Edvard Munch's "The Scream".  I have a quick project for those that finish early or those that want to finish at home.

We will be using our names to create an abstract design.  Abstract is defined as art that does not attempt to represent reality but achieves it's effect by using shape, form, color and texture (some of our elements of art).

Students will be given a square of paper and write their names in large block style.

block style name
The letters will be colored in with marker in one color. We will take care not to scribble with the markers, but to color with even strokes to fill in the letters.
letters colored in with marker
Next the paper will be folded so we get 16 rectangles.  These will be cut up into individual pieces.

cut up name

The pieces will be assembled together to create an abstract design. We do not want to put the name back so we can read it, but play around with the pieces until we achieve an interesting, balanced design.
putting the pieces back together
Students then have the option of adding some color to the background using crayons.
color using crayons

Monday, November 10, 2014

Famous Artist Study - Edvard Munch

"The Scream" (1895) by Expressionist artist Edvard Munch is as famous as van Gogh's " Starry Nights".  Both artists are very similar:  both suffered from mental issues, used bold exaggerated colors and simplified figures and shapes and these two pieces are the most reproduced pieces of art in the world.

Munch, born was born in Norway in 1863 and died in 1944.  He produced four versions of "The Scream" in various mediums. He was an expressionist artist. Expressionism was a modern movement originating in Germany at the beginning of the 20th century. Artists typically presented the world solely from a subjective perspective, distorting it radically for emotional effect to create a mood or idea.

We will be focusing on Munch for this lesson.  Although the work may be a little disturbing or scary when viewed, it is a great lesson for perspective (the bridge) and creating movement (sky and fjord) and feeling through color.  We will be putting our own twist on the work by replacing the figure of Munch (it is a self portrait) and adding "things that make us scream".

Here is one of the original four that Munch painted.


Here is my background done in oil pastels.  Students will create a simple background focusing on the bridge and bold use of color.
What makes me scream?  Large amounts of laundry!  I hope the kids have fun expressing themselves with this project.

Playful Puppy Birthday Paint Party

Three adorable pups personalized with spots
Cubist looking puppy

Birthday girl's puppy

Sunday, October 26, 2014

Saturday Night "Poppies" Paint Party

painting the background
Saturday night I painted with a great group of ladies. Here are a few pictures from the paint party.

Positive/negative

Autumn is my favorite time of year and I enjoy doing fall inspired projects.  We will be working on a positive/negative design.  This project uses symmetry, reverse image, pattern, line and positive/negative space.

Positive/negative space play an important role in determining the overall composition. It creates balance. Positive space is the subject area while negative space is the area around the subject.  The shapes of the negative space are determined by the shapes of the positive space.

Students will be given a color piece of paper (positive) and a black paper (negative).  They will create a simple design (pumpkin, owl or their choice) with cut outs. The design will be glued down creating a reverse image and symmetrical design (equal on both sides).

The next step is to use line and pattern again in a mirror image, creating symmetry. Here is an owl with line patterns being added.

Sunday, October 19, 2014

"Playful Puppy" Photos

Saturday October 18th was my first paint party at Proximity Cafe in Pottstown, PA.  Proximity is a super cool coffee house with a great menu and coffee. They feature lots of local musicians and open mic nights.  The Cafe is a church plant/outreach of Penn Valley Church/Grace Christian School where I teach art. 

"Playful Puppy" was geared for ages 6 and up.  Four girls and one adult painted with me. A portion of each fee was donated to Mostly Muttz Dog Rescue.   I don't like "cookie cutter" art so I am open to participants picking their own colors during a paint party. The girls ran with this.  When I start hearing "do we have to do this... can I use this color?" it makes me smile because I know the creative juices are flowing!  Here are the finished paintings as well as photos of the girls working on their paintings.

I will be teaching an adult party this Thursday, October 23. We will be painting "Sunflower". Please contact me to sign up!


Monday, October 13, 2014

Social Painting Fundraiser Event

Please join me this Saturday, October 18th, paint Playful Puppy and help raise money for Mostly Muttz Dog Rescue.

The painting event will be held at Proximity Cafe in Pottstown from 5pm to about 6:30 pm. I will lead kids ages 6 and up (adults are welcome to paint) step by step through this 12"x12" painting. You can personalize Puppy's tag with your dog's name!  The cost is $20 and I will donate $5 from each fee to the dog rescue.  You get to leave with a cool painting AND help dogs in need!  The Cafe has great food and coffee for parents to eat/drink while the kids are in class.

Please email me to register or for further information.


10/14 - Perspective From the Bottom Up

In this class I will combine my annual tree lesson with a perspective lesson.  Perspective is a drawing technique used to illustrate dimension through a flat surface.  Our project will use a worm's eye view - looking from the bottom up.  Worm's eye usually includes three vanishing points: one point at the top, one point to the left and one to the right.  We will be using crayons for this project.

Students will have their choice of tree projects.  This single tree is good for adding some texture and shading since it is larger.

This cluster is trees places the viewer in the middle of a forest, looking up at the canopies.
This drawing takes the viewer's eye skyward, following the trunks up to the colorful leaves.

Monday, September 29, 2014

9/30 Op Art

Optical Art (Op Art) is a style of visual art that makes use of optical illusions.  The works are abstract with many done in black and white.  When viewed, the impression given is movement, flashing and vibration, patterns and warping or swelling.  Two Op Artists stand out:  Victor Vasarely, the father of Op Art (b 1906-1997) and Bridget Riley know as the mother of Op Art (b 1931- ).  Both artists were pioneers in this movement.  Vasarely shocked viewers in the 1930s with this unusual art form which did not go over well. Riley rocked the art world in the 1960s with her black and white works and the movement went wild with many Op Art artists following her.

Last class we worked on taking a circle to a sphere by creating the illusion of 3 dimension through value (light to dark).  This project will also involve spheres.  We will create a 3D look with lines to create an illusion of the spheres "popping" out of the background in this Op Art style project.

Students will be working with straight and curved lines.  The background grid will be straight while the circles will have curved lines.  The curved lines are the key to this project!

Both background and circles will be colored in a checker board pattern.  I added some value to the circles along the edges to help create the sphere look.  Students work in crayons and colored pencils. but only use one color.

Sunday, September 14, 2014

Solar System with Value

Welcome back!  I am excited to begin fall classes this Tuesday.  We will begin with a review or an introduction (if your student is new) to the seven elements of art: color, line, shape, form, space, texture, value.  One or more of the elements is present in every project we will do.  They work together such as lines forming shapes and color adding value to show space.

Our first project is creating a solar system and adding value (light to dark) to the planets to take them from circle to sphere.  A circle is flat while a sphere is round, circular three dimensional object that resembles a ball.  Now we won't be adding balls to our project, but by adding value to our circles, we can create an illusion of roundness that resembles a sphere.

spheres showing value:  light to dark
Our solar system will have a light source - the sun.  Our planets will have a light side (facing the sun) and a darker side or shadow that is further from the light source.  Students can create as many planets as they like and whatever colors they want. They will work with oil pastels.  We will be gluing the planets onto black paper that has been splattered with "stars".


Solar System with Value

Tuesday, August 12, 2014

Now Booking Painting Parties

Pears
Poppies
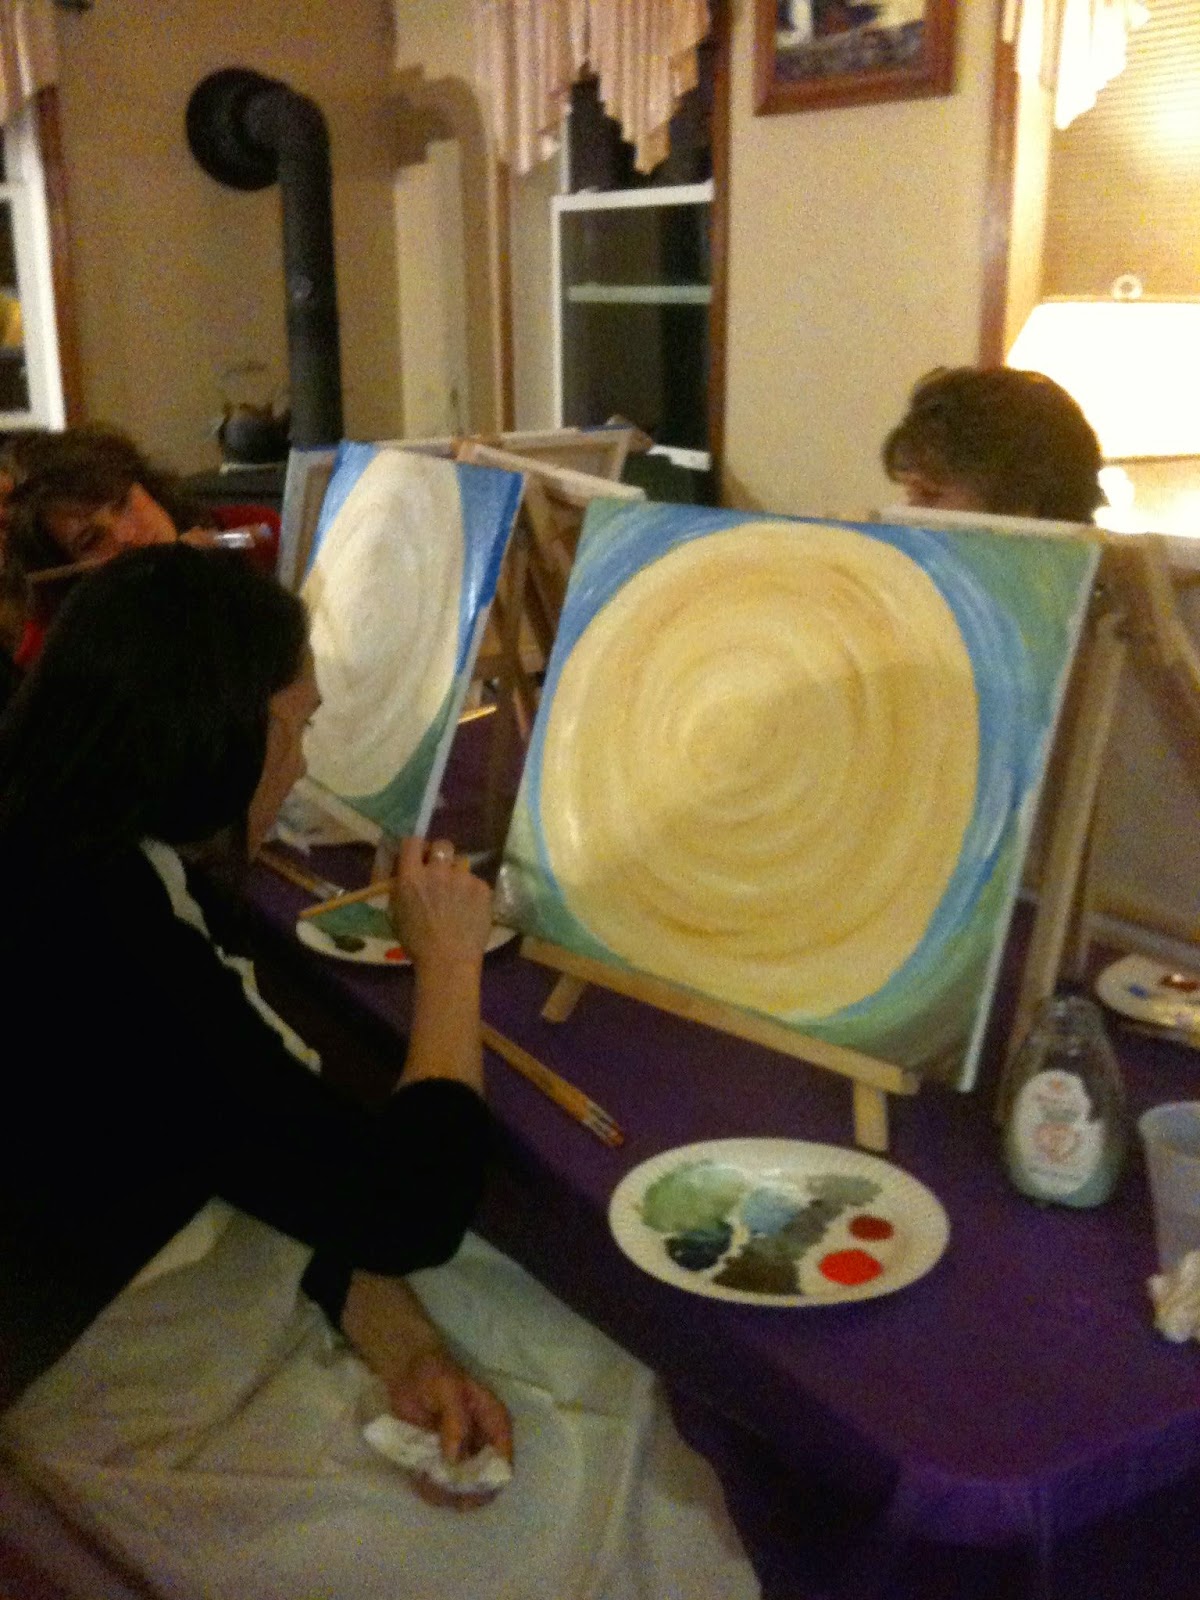
A new addition to my art business is painting parties.  You choose the project, gather at least five friends, add some snacks & beverage of choice and I bring everything to your location for a fun, stress free social gathering.

Don't know how to paint?  No worries.  I walk you through the project, step-by-step, encouraging, guiding and most importantly providing the setting for a memorable event.  After about two hours, you will leave with a beautiful 16" x 20" canvas that you can proudly display!

 Displayed are three party examples that I have painted.  Through the company that I am an independent consultant for, I have access to more than 30 great projects to choose from.  Perfect for a ladies-night-in, couples night, small groups, women's retreats, family reunions, bridal showers, young married groups.  Book now for holiday parties!

I also offer kids' painting parties. What a unique, fresh idea for at home birthday parties.  Young artists will be lead, step-by-step, through their project and leave with a rocking 12"x12" canvas.  There is a gallery of designs just for kids. Perfect for boys and girls.  I will post a few examples soon.
 
Please see side bar for more information.  Feel free to contact me with questions, customize your party or to check availability and book your party.
Whimsical Tree


Sunflower

Wednesday, June 11, 2014

Tunnel Book Workshop - July 29, 2014

I will be offering a tunnel book workshop on Tuesday July 29th at 9:30-12 and, if the first class if full, from 12:15-2:45pm at Leidys Church in Souderton. A tunnel book is a three dimensional, layered book. Each page has cut outs with the back page being solid.  This adds visual interest as the viewer looks at all the layers and reads the poem. Yes, we will be writing a Haiku poem that will be the illustrations in our book.  If you sign up, I will send information on how to write the poem so participants can have ideas before they come to the session.  I will also have poems available in case of writers block. 

Tunnel books appeared in the late 1800s as a book to commemorate special events or sold as souvenirs of tourist attractions.   The name came from a book made for the opening of the tunnel under the Thames River in England.  They were referred to as "peep shows".  The page openings allow the viewer to see through the entire books and the "pop out" images on each page work together to create a dimensional scene.

The workshop is open to students and parents. I had moms attend the art journaling workshop last summer!  My only requirement is that your child can measure 3/4" and 1" borders and be able to cut out their drawings on four pages. I will check everyone's work, but will be unable to measure out the pages for everyone.


Sunday, June 8, 2014

Warm and Cool Sun

This week will be a continuation of color theory for the 10 am class and an overview for the 11:30 class.  

A color wheel (red, orange, yellow, green, blue, violet) is divided into warm and cool colors.  Warm colors (red, orange, yellow) are vivid and energetic and tend to advance or appear more active in a painting.  Cool colors (blue, green, violet) give an impression of being calm and soothing, they also tend to recede in a painting.
 
This week we will begin a painted canvas project of a sun.  Students will trace a circle to make the correct size of the sun's face. We will divide the face in half to give it a cubism look. We will add rays using straight and curved lines. Students will paint their sun using warm and cool colors. They can mix white paint to give them a tint of that color therefore creating a larger paint palette to work with.

This sun was painted, starting at the left moving right, cool, warm, cool, warm, cool, warm. 

If the above is to complicated, students can simplify and do half the face cool and half warm or a warm sun and cool background or cool sun and warm background.  This is example was done in crayon showing half cool and half warm.  Our project will be painted.
crayon example, our project will be painted

Sunday, June 1, 2014

"Down the Well" - 6/3 (11:30 am class)

This lessons is packed with the elements of art. We will be working with five out of seven elements (line, shape, color, space, value). Lines will be used to create shapes (circle, rectangle), space will be represented by foreground, middle and background, we will use color and value to further show perspective. Perspective is the drawing of solid objects on a two dimensional surface and gives the impression of height, width and depth.

We will be drawing a well with an object trapped at the bottom. What got dropped/fell down your well? A frog, mouse, kitten, baseball, food wrapper... Students will start with a circle in one of the upper corners.  We will use curved lines and vary the size and spacing to show perspective. I traced my bricks in marker.


Objects will be drawn around the top of the well.  These get drawn lightly to show distance. The bricks will be colored in using value: dark to light.  This will help add the illusion of depth.
Down the Well - perspective

Color Wheel Chameleons - 6/3 (10 am class)

Color theory has three basic categories: color harmony, the context of how colors are used and color wheel which is what we are focusing on in this lesson.  Sir Isaac Newton developed the first circular diagram of color in 1666.  The color wheel consists of primary, secondary and tertiary colors. All our colors come from just three (primary) colors: red, blue, yellow.

Rather than do a traditional color wheel, we will create ours in the form of a chameleon. Chameleons are a lizard. The 160 species come in a wide range of colors - perfect for a color wheel!  We will do a practice drawing first then redraw on our good sheet.  Since they are found in warm climates, rain forests and deserts, students will have a choice as to the setting for their chameleon.

We will be using primary and secondary colors for this project. Students will have a choice of crayons or color pencils.
color wheel chameleon

Monday, May 19, 2014

Rene Magritte Inspired Eye

Our artistic study is on Belgium artist Rene Magritte.  Magritte was part of the surrealism movement and liked to challenge people's ideas on what they should see through his paintings.  He said "if the dream is a translation of waking life, waking life is also a translation of the dream."

The surrealism movement began in the mid-1920s in France.  It started as a philosophical movement that said the way to find truth in the world was through the subconscious mind and dreams rather than logical thoughts.  Surrealism artwork often made little sense because it usually depicted a dream or random thought.

Our project is based on Magritte's work "The False Mirror".  I will show an image of this piece in class.  You can also google it.  The work features a close-up of an eye.  The eye forms a frame of blue sky and clouds.  The pupil is a contrast between the hard outline of the pupil and the soft clouds.  Some questions I came across when looking at the work:  "is the sky part of the eye?", "is the sky reflected by the eye?", "is the eye a looking glass to see the sky?"  "The False Mirror" was also described as "the viewer looks through it as a window and is looked at by it (eye)."  This should provide some lively conversations in class as we discuss the piece and what the students see!

For our project, we will draw a very large eye.  The students will then create their own scene.  They will have a choice between crayons, colored pencils and markers to add color to their work.

Please excuse the very bad photo of my example!


Wednesday, May 7, 2014

Mixed Media Treehouse - 5/13/14

Our late spring session begins with a mixed media piece.  Mixed media refers to multiple mediums being used.  For this project students will use the following medium: paint, crayons, markers, oil pastels and paper.  We will use color, line, texture and shape some of our seven elements of art found in every art work in some combination.

Students will create a textured background with paint.  We will do a quick drawing lesson on trees and then create one out of paper adding details with oil pastels or crayons.


We will look at some photos of tree houses.  Students will draw and color a simple tree house and cut it out.
Final touches such as a ladder and leaves will be added.  This project will most likely be finished in week two.

Monday, April 7, 2014

Inspired by Monet's Waterlilies and the Japanese Bridge - 4/8/14

Our famous artist study will be Claude Monet a French Impressionist painter.  Impressionism is a 19th century art movement originating with Paris based artists. It captures an image as if you just glanced at it and uses bold colors rather than details.  Impressionist paintings are mostly outdoor scenes and done in the twilight or evening to produce a shadowy effect.  The short brush strokes are visable and colors are applied side by side with little mixing.  Black paint is avoided and the artist will mix complimentary colors (purple/yellow, red/green, blue/orange) to produce dark tones.

Here is the inspiration for our project:  Monet's Waterlilies and the Japanese Bridge.  Monet and his family owned a house and property in the French countryside that included a water meadow.  He began a vast landscaping project that included lily ponds that would become the subject of 250 paintings in his waterlily series.
We will create our project in two steps.  First we will paint a background without a lot of details.  Colors and brush strokes will be used to create a pond and foliage.  Part two will be to make the pop out for the Japanese bridge and tissue paper for the waterlilies.  The end result will be a 3D, mixed media version of Waterlilies.

Monday, March 31, 2014

Blue Dog - 4/1/14

Our next project will be inspired by Cajun artist George Rodrigue and his famous "Blue Dog".  Mr Rodrigue was born in Lousiana in 1944.  He studied art and went on to paint Louisiana landscapes depicting moss clad oak trees native to the area known as French Louisiana.  He became famous in the 1990s when he painted Blue Dog based on a Cajun legend.  The dog's shape and stance was modeled after Rodrigue's deceased dog Tiffany.

Rodrigue wrote on Blue Dog "The yellow eyes are really the soul of the dog. He has this piercing stare.  People say the dog keeps talking to them with the eyes, always saying something different. People who have seen a Blue Dog painting always remember it. They are really about life, about mankind searching for answers. The dog never changes position.  He just stares at you. And you are looking at him, looking for some answers, "Why are we here?" and he's just looking back at you, wondering the same. The dog doesn't know. You can see this longing in his eyes, this longing for love, answers."
Not all dogs are blue.  Oak trees are common in his work.

We will look at Rodrigue's work.  We will be sketching out our version of "Blue Dog".  Either a close up or...
a full body version. 
We will be using tempera paints for this project.
A fun background can be added.